VPN Connectivity
VPN access routes your local machine directly into a deployment’s internal network. Once connected, your machine appears as a node on the same network as the VMs — you can reach them by IP, run local tools against them, and interact with services exactly as if you were on-prem.
This is an advanced access method. Most users don’t need it — the browser console gives you everything you need to operate within the lab. VPN is for when you want to bring your own toolset to bear against the environment.
Use Cases
Section titled “Use Cases”- Bring your own attacker box — VPN your local Kali (or any attack image you’ve built and tuned over years) into the scenario and engage the lab VMs just like an on-prem engagement
- Running Burp Suite, Ghidra, BloodHound, Impacket, or any tool from your local machine against lab targets
- Writing and executing scripts that interact with multiple machines in the scenario network
- Connecting tools that don’t have a browser-based interface
- Anything that requires a direct network connection rather than a console session
Setting Up
Section titled “Setting Up”Click the key icon in the deployment dock to open VPN Configuration.
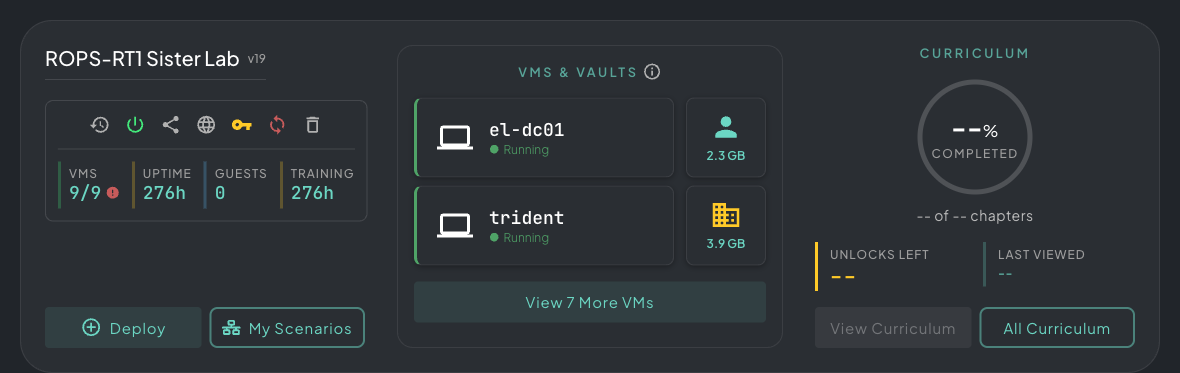 The key icon lives in the deployment dock alongside your featured VMs — click it to open VPN Configuration.
Then click + Create Config to generate a new VPN config for this deployment.
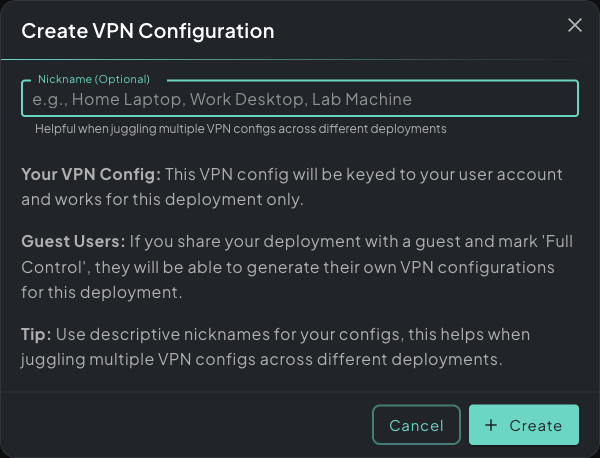 Create VPN Configuration dialog — each config is keyed to your user and scoped to this deployment only.
Give it a nickname — useful if you connect from multiple machines (e.g. “Home Laptop”, “Work Desktop”). Each config is keyed to your user account and scoped to this deployment only. Guest users with Full Control access can generate their own separate configs.
Once generated, the config appears in the list with a Download VPN Config button.
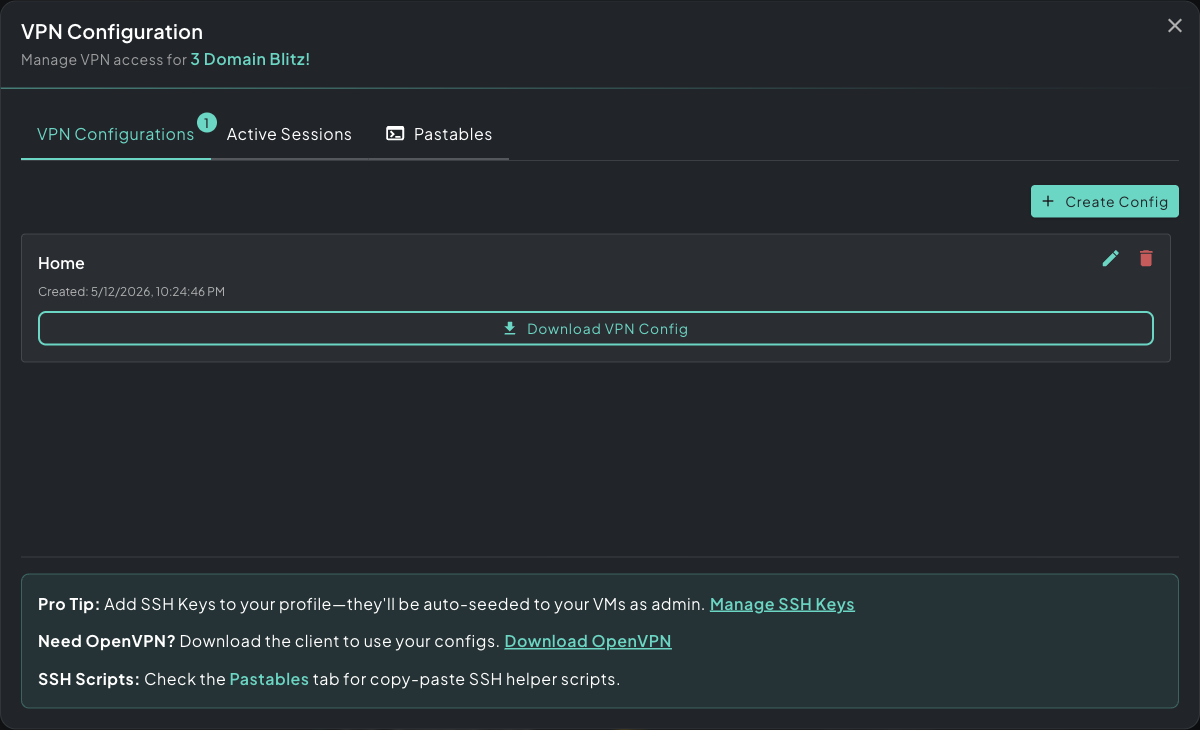 VPN Configuration panel — your generated config is ready to download as an .ovpn file.
Connecting
Section titled “Connecting”- Download the
.ovpnconfig file - Import it into your OpenVPN client — Download OpenVPN if you don’t have it
- Toggle the connection on
Your local machine is now on the deployment’s network. Lab machines are reachable at their assigned IP addresses, visible in the deployment panel.
Firewall Reach
Section titled “Firewall Reach”When you connect over VPN, allow-all inbound rules are installed for your tunnel — your local machine can hit any VM in the deployment on any port, regardless of the scenario’s internal firewall layout. The scenario’s own segmentation (firewalls between VLANs, AD trust boundaries, etc.) still applies to lab-to-lab traffic, just not to traffic coming from you.
Think of the VPN tunnel as an admin position outside the game — useful for testing or scripting, but be aware it skips the normal pathing students would take inside the scenario.
SSH Helper Scripts
Section titled “SSH Helper Scripts”The Pastables tab generates ready-to-run SSH scripts pre-populated with every VM’s IP, username, and credentials. Copy the script into your local terminal — once connected to the VPN, the run, upload, and download commands give you direct access to any machine in the scenario without any manual configuration.
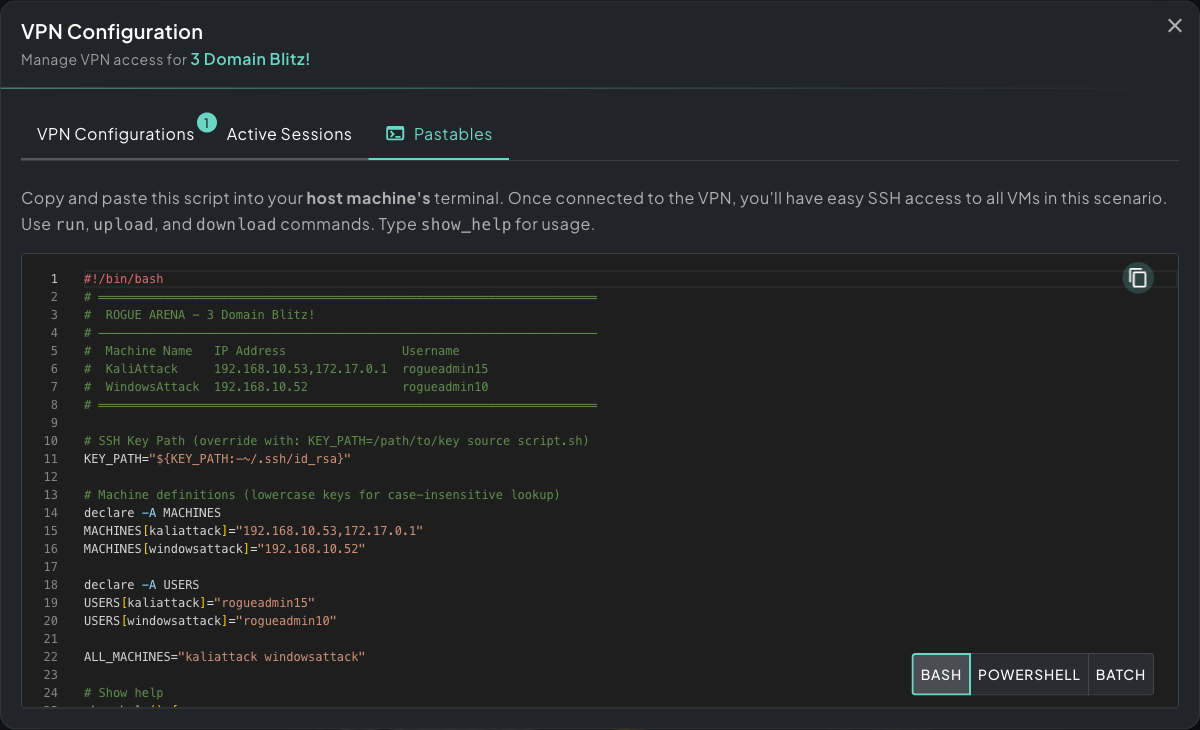 Pastables tab — generated SSH helper scripts with every VM’s IP, username, and credentials pre-filled.
Bash, PowerShell, and Batch variants are available depending on your local OS.
Multiple Configs
Section titled “Multiple Configs”You can create multiple configs per deployment — one per device you work from. Each config is independent; delete ones you no longer need. If you’re running multiple concurrent deployments, each one has its own set of configs.
Disconnecting
Section titled “Disconnecting”Toggle the connection off in your OpenVPN client, or delete the tunnel. The deployment and its machines are unaffected.