Building Curriculum
The Curriculum Builder is where you author the teaching content that ships with your scenario — chapters, sections, tasks, questions, and the unlock keys that gate progression.
Opening the Curriculum Panel
Section titled “Opening the Curriculum Panel”Every curriculum journey starts the same way: open the canvas, then click the Curriculum icon in the left rail to pop out the curriculum slide-out.
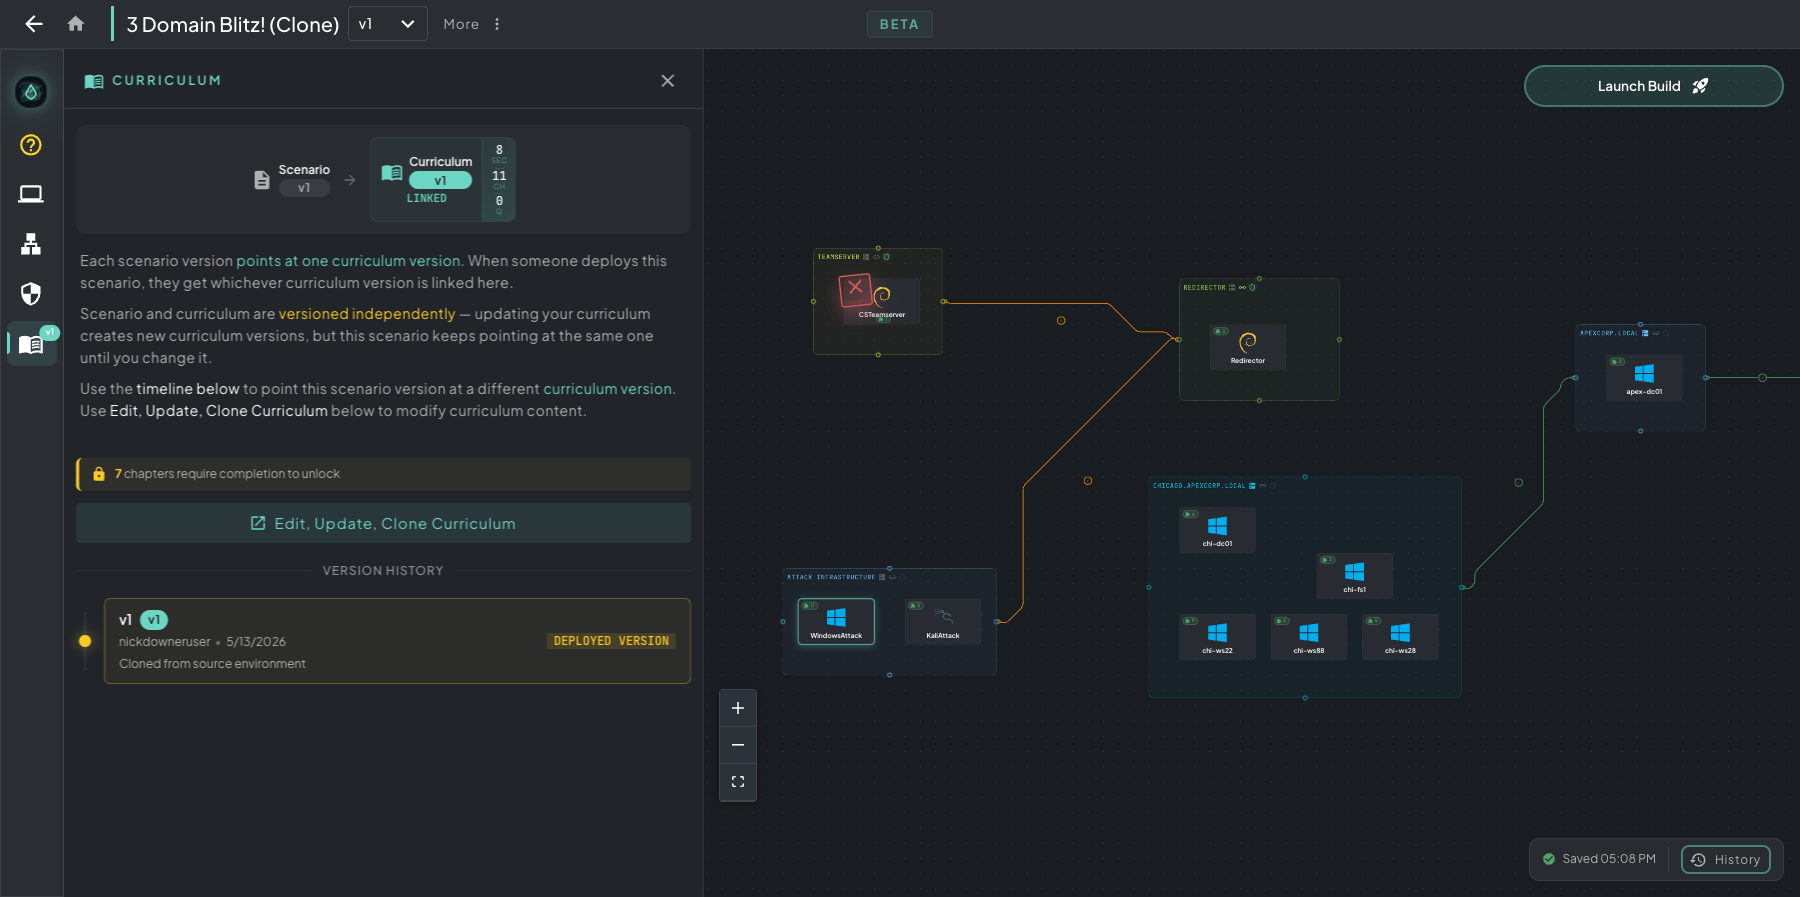 Curriculum slide-out — current link at the top, Edit / Update / Clone controls in the middle, full version history below.
This panel is where you wire up which curriculum version this canvas version ships with. Canvas versions and curriculum versions are independent — you can keep iterating on draft curriculum while the canvas points at the previous version (so students stay on stable content), then link the new one in when it’s ready.
From here you can:
- See which curriculum version this canvas version is currently linked to
- Link the current canvas version to any curriculum version (older ones too)
- Unlink so the canvas ships without curriculum
- Edit / Update / Clone the linked curriculum — this is the route into the Curriculum Builder
- Browse the full Version History to roll back if needed
Click Edit / Update / Clone Curriculum to open the Curriculum Builder and start authoring.
The Curriculum Builder
Section titled “The Curriculum Builder”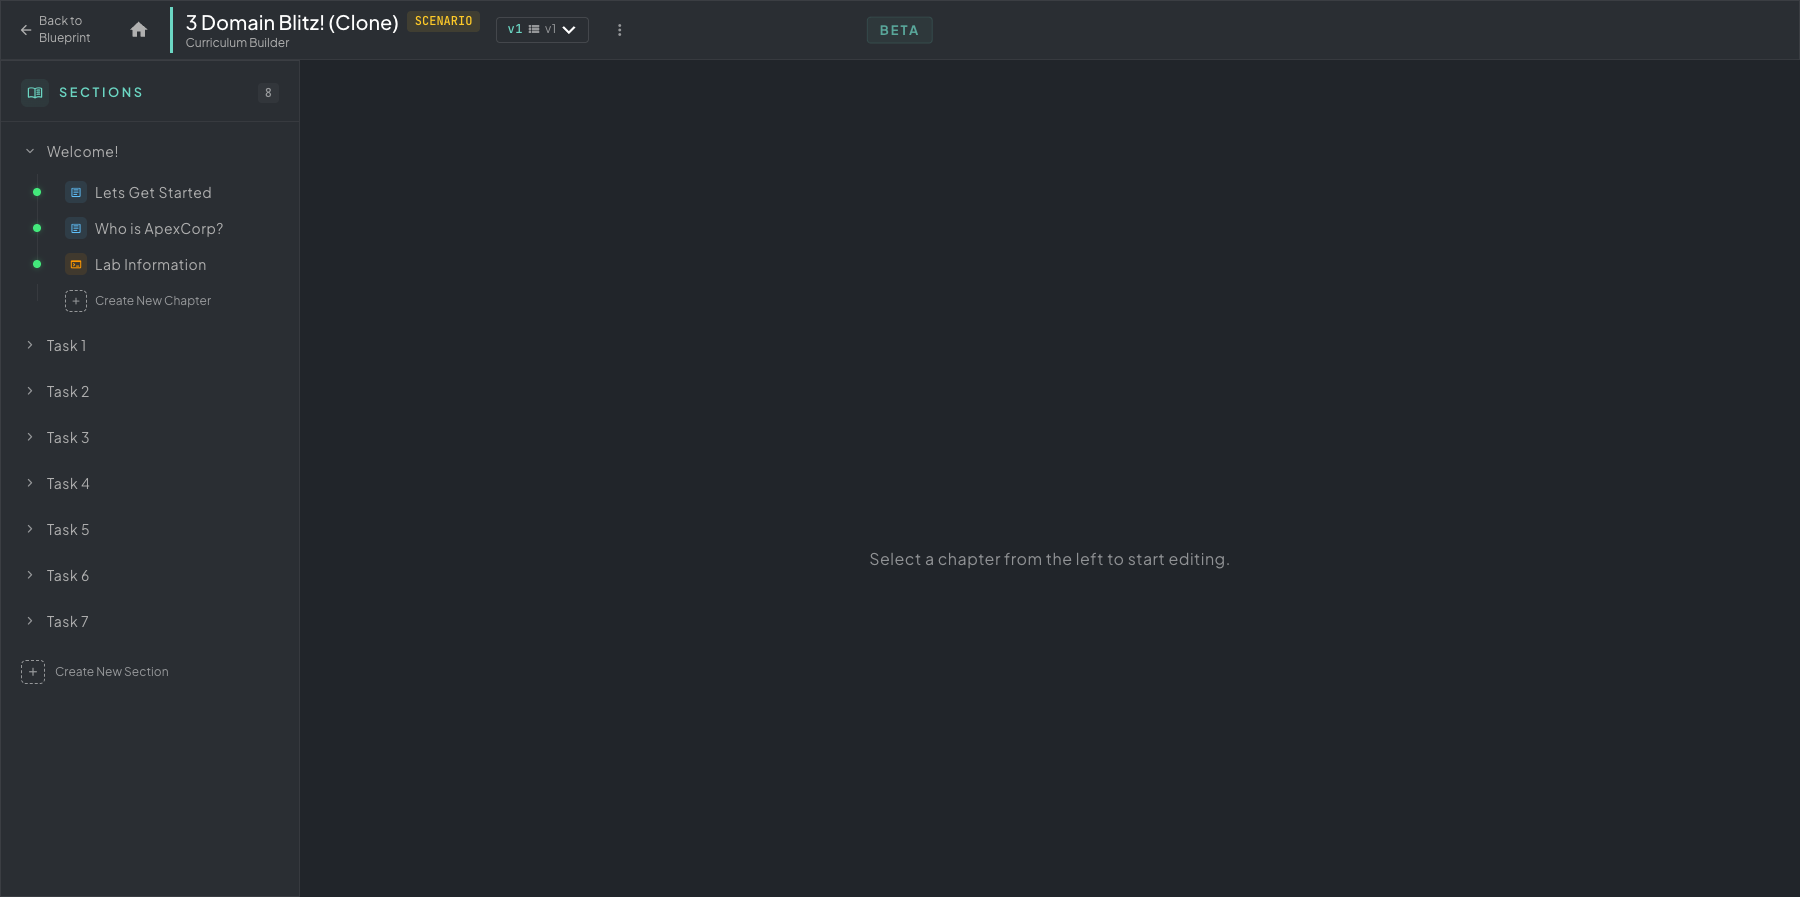 Curriculum Builder — Sections on the left, content editor on the right. Each section can hold multiple chapters; each chapter can hold any number of content blocks.
Curriculum is independent of the build cycle — you can author it before, during, or after a build, and updating it doesn’t require re-templatizing.
Sections and Chapters
Section titled “Sections and Chapters”The structure is two layers deep:
- Sections — top-level groupings (Welcome, Task 1, Task 2, etc.). Use + Create New Section at the bottom of the sidebar.
- Chapters — the unit students actually read and answer questions in. Live inside a section. Use + Create New Chapter under any expanded section.
Drag to reorder. A green dot next to a chapter means it’s unlocked by default (no flag gating); a padlock means it’s gated by an unlock key.
Authoring a Chapter
Section titled “Authoring a Chapter”Click any chapter to open the block-based editor. On the right, the Available Blocks rail lists every content type you can drop in.
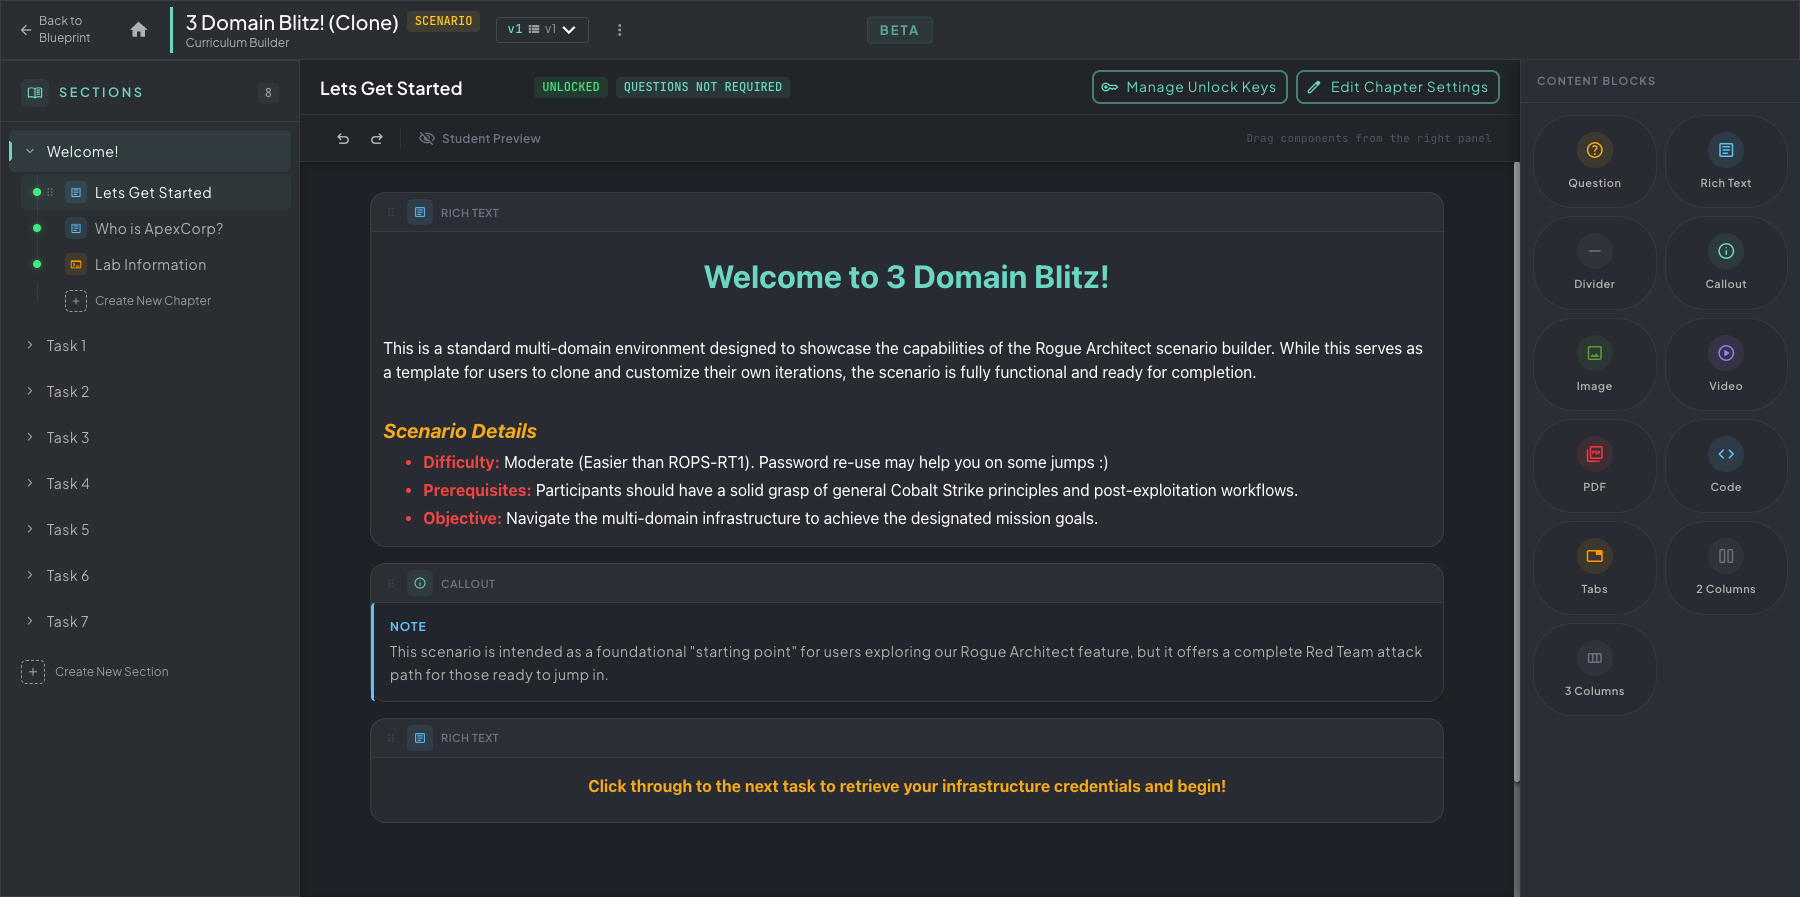 Chapter editor — rich content on the left, drag-and-drop block palette on the right.
A few of the block types you’ll reach for most:
- Rich text — formatted prose with headings, lists, bold/italic, inline code, links
- Note / Tip / Caution — callout asides for context, hints, and warnings
- Image — drop images inline (screenshots, diagrams, mission briefs)
- Embed — videos and other external content
- Question — multiple-choice, free text, or flag submission, scored automatically
- Code block — fenced code with syntax highlighting for commands or scripts
Drag blocks from the palette into the chapter, then click to edit content in place.
Unlock Keys
Section titled “Unlock Keys”Click Manage Unlock Keys in the chapter header to gate a chapter behind a flag students must capture inside the lab. Hit Add Key to launch the six-step stepper.
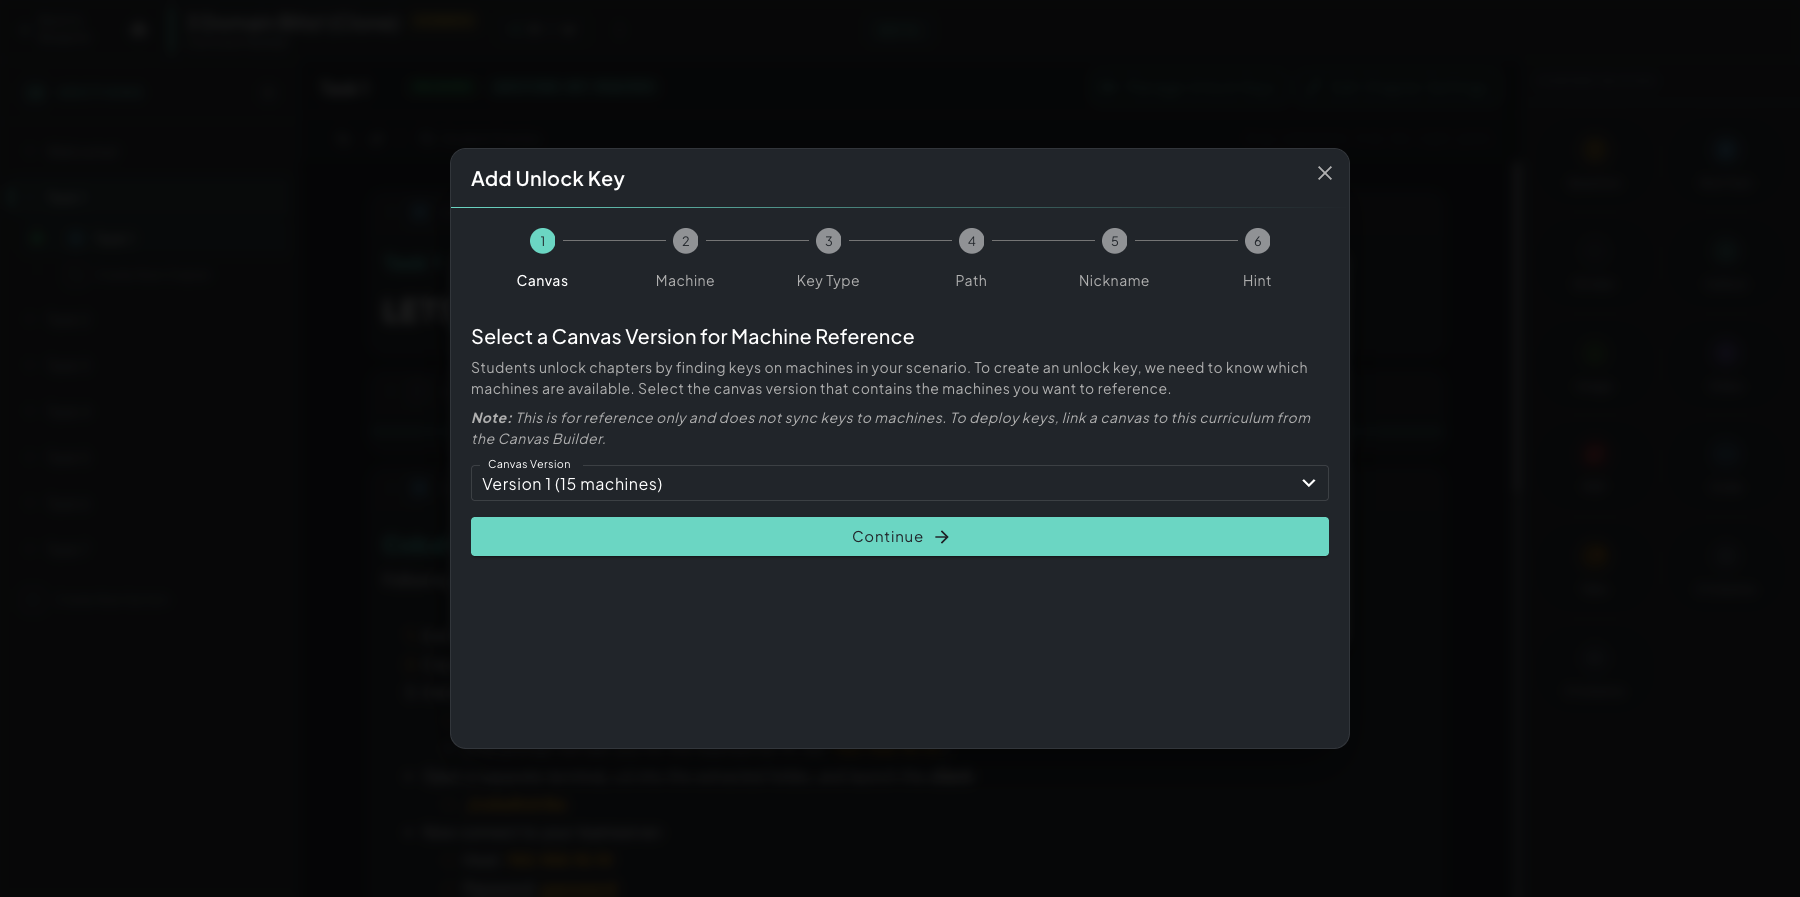 Add Unlock Key stepper — six steps from picking which machine hosts the key to writing the student-facing hint.
The six steps:
- Canvas — pick the canvas version whose machine list you want to reference. This is reference-only (it doesn’t sync keys to machines); it just gives you the dropdown of machines for the next step.
- Machine — pick which machine in that canvas the key lives on (the one students will jump on and search for the flag).
- Key Type — what kind of key this is (file content, environment variable, registry value, etc.) so the platform knows how to validate the submission.
- Path — where on the machine the key lives (file path like
C:\letsgo.txt, registry key, env var name, etc.). - Nickname — a friendly internal name for this key so you can identify it later in the keys list.
- Hint — the message students see when they click the locked chapter. Point them at the machine and roughly where to look — the more cryptic, the more hands-on the lab work.
When a student clicks a locked chapter, they see your hint, work the lab to find the flag, and paste it in to unlock. Keys are salted per learner so flags can’t be shared between students. See Flag Unlocks for the student-side view.
Team Collaboration Unlock
Section titled “Team Collaboration Unlock”For team-based scenarios, you can enable Team Collaboration Unlock — chapter unlocks then apply to the whole deployment rather than per-user, so a team can divide and conquer. Reflected in the student docs at Curriculum progress.