Creating VLANs
VLANs are the foundation of your scenario’s network topology. Each VLAN represents an isolated network segment that contains one or more virtual machines.
Adding a VLAN
Section titled “Adding a VLAN”- Find the Networks section in the left sidebar
- Drag a VLAN onto the canvas
- A configuration panel opens on the right — give your VLAN a unique nickname
- Click Save
The VLAN appears as a container on the canvas. You’ll drop machines into it in the next step.
 Networks panel open on the left — drag the VLAN tile onto the canvas. The CHICAGO.APEXCORP.LOCAL VLAN on the right shows a finished domain segment: DC, file server, and workstations all grouped inside one container.
VLAN Settings
Section titled “VLAN Settings”Rogue Architect abstracts away network configuration so you don’t have to think about IP schemes, gateways, DHCP pools, or DNS at all — give the VLAN a nickname and you’re done. The platform fills in sensible defaults for everything else.
If you want to get hands-on with the networking — set your own CIDR, choose specific DHCP ranges, route DNS to a specific DC, pin static host mappings — toggle Advanced Settings further down.
Basic Settings
Section titled “Basic Settings”- VLAN Nickname — A unique, descriptive name for this network segment (e.g., “Corporate LAN”, “DMZ”, “Attacker Network”)
Advanced Settings
Section titled “Advanced Settings”Toggle Advanced Settings to configure networking details. If you leave these at their defaults, Rogue Architect will assign sensible values automatically.
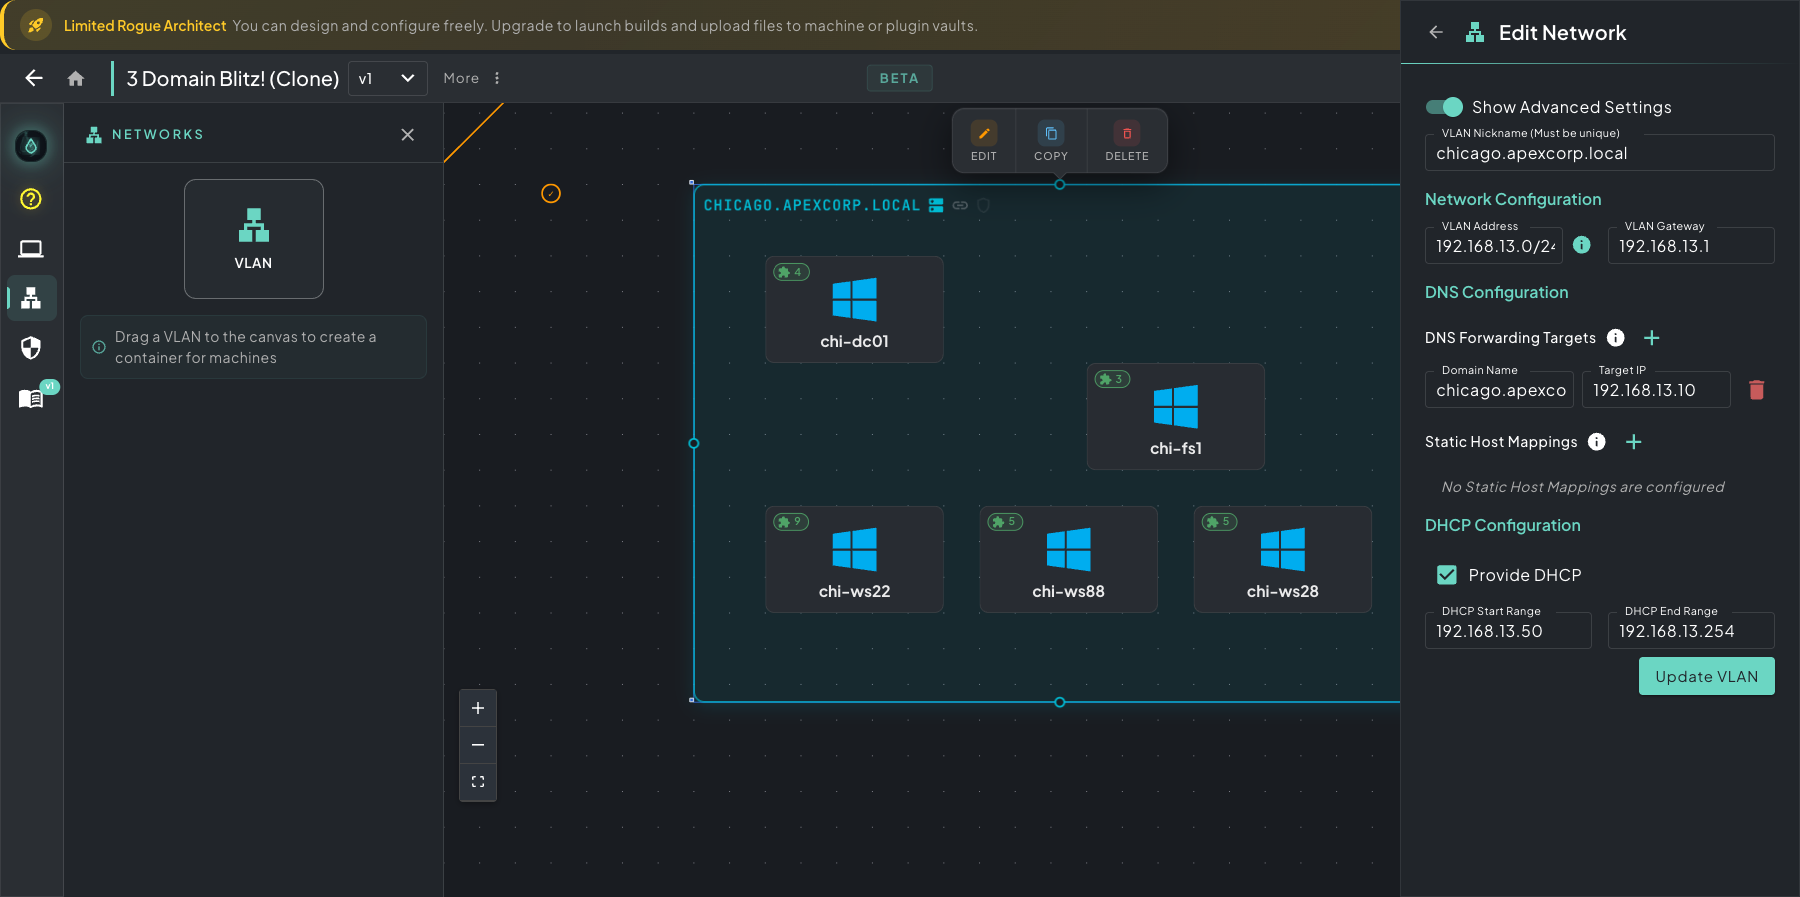 The Edit Network panel with Advanced Settings on — nickname, network address/gateway, DNS forwarding, static host mappings, and DHCP range all live in one slide-out.
- Network Configuration
- VLAN Address — the network address in CIDR notation (e.g.
192.168.1.0/24). Must be the network address ending in.0, not a host address. - VLAN Gateway — the gateway IP for this network segment.
- VLAN Address — the network address in CIDR notation (e.g.
- DNS Configuration
- DNS Forwarding Targets — forward DNS requests for specific domains to designated IP addresses. Useful for routing domain FQDNs to Domain Controllers or setting up DNS-based C2 channels.
- Static Host Mappings — map specific FQDNs directly to IP addresses. Mappings apply canvas-wide, not just within this VLAN.
- DHCP Configuration
- Provide DHCP — enable or disable DHCP for this VLAN.
- DHCP Start Range — first IP address in the DHCP pool.
- DHCP End Range — last IP address in the DHCP pool.
Firewall Rules
Section titled “Firewall Rules”Network traffic between VLANs is governed by firewall policies. Click the Firewall Rules icon in the left rail to open the Firewall Configuration panel.
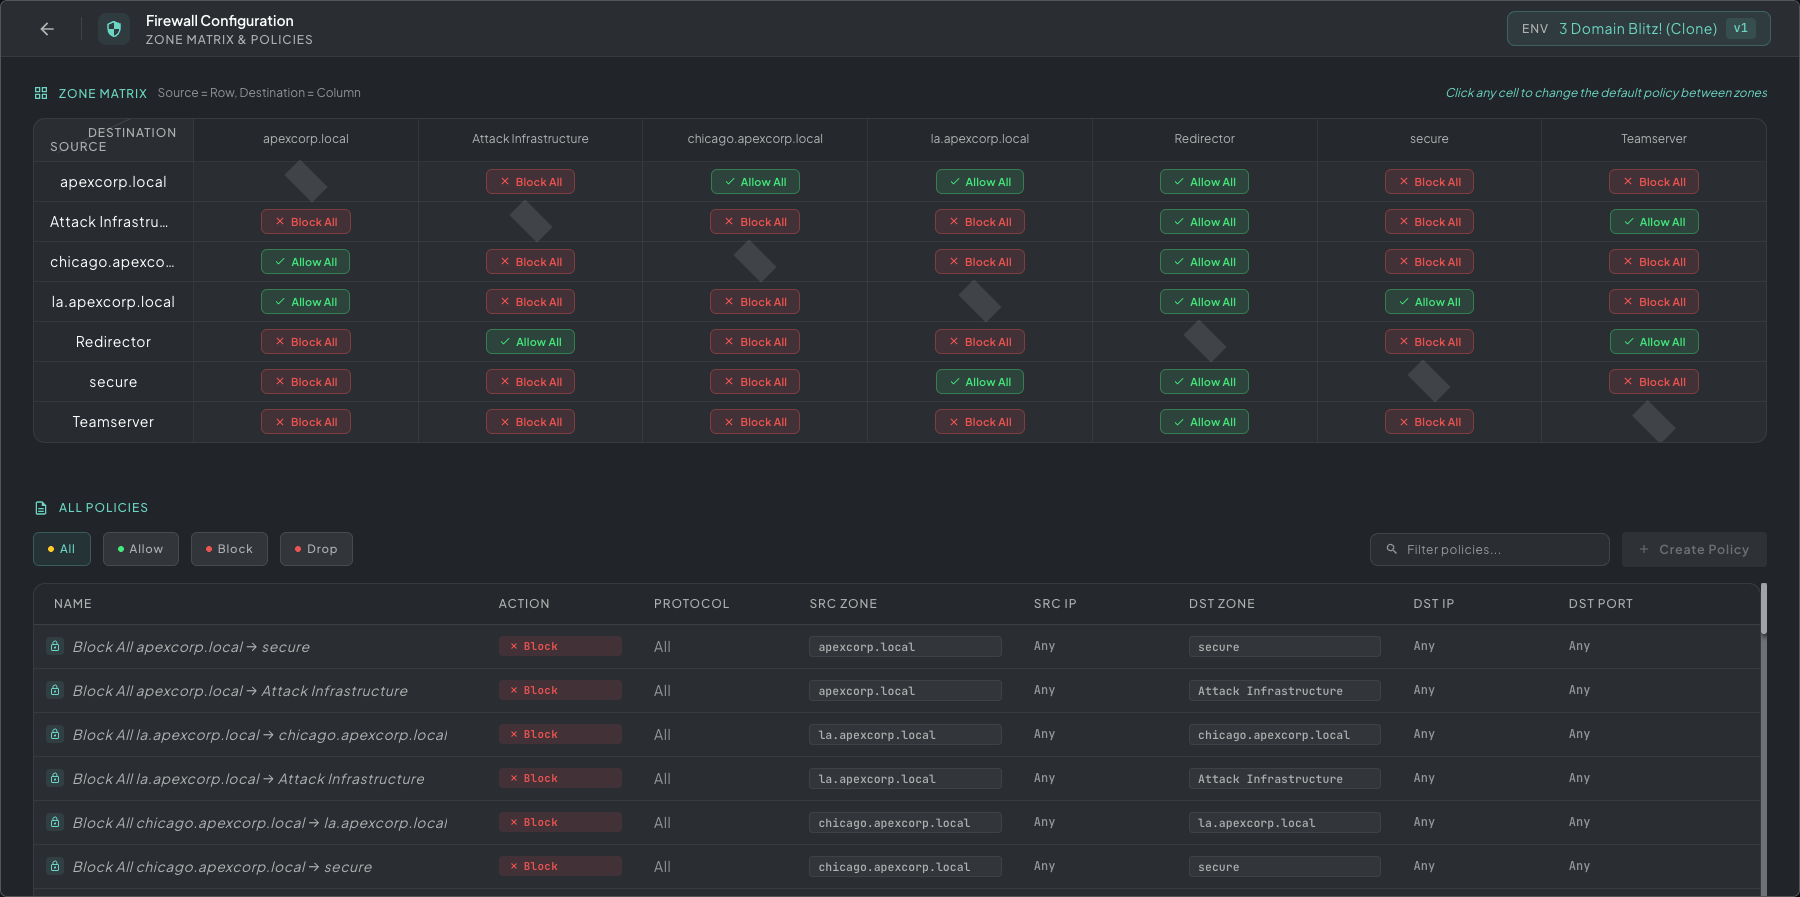 Firewall Configuration — zone matrix on top (source rows × destination columns) for quick blanket allows/blocks, individual policies below for finer-grained source/destination/port rules.
The panel has two sections:
- Zone Matrix — a grid of every VLAN against every other VLAN. Click any cell to toggle the default policy between that source and destination (Allow All or Block All). Use this for blanket statements like “Attack Infrastructure can hit anything” or “Secure VLAN is isolated from everything.”
- All Policies — fine-grained rules below the matrix. Hit + Create Policy to specify exact source zone/IP, destination zone/IP, protocol, port, and action (Allow, Block, Drop). Filter the list by action chips at the top.
Policies are evaluated in order; matrix defaults apply when no individual policy matches.
Cloning
Section titled “Cloning”Right-click a VLAN to clone it along with all of its machines and their plugin configurations. This is useful when you need multiple similar network segments (e.g., multiple team environments).