Configuring Plugin Parameters
Each plugin has parameters that control its behavior during the build. Some are required (the build won’t work without them), others are optional with sensible defaults.
Opening Plugin Configuration
Section titled “Opening Plugin Configuration”- Double-click a machine to enter machine edit mode
- Click on a plugin in the build sequence
- The parameter configuration panel opens
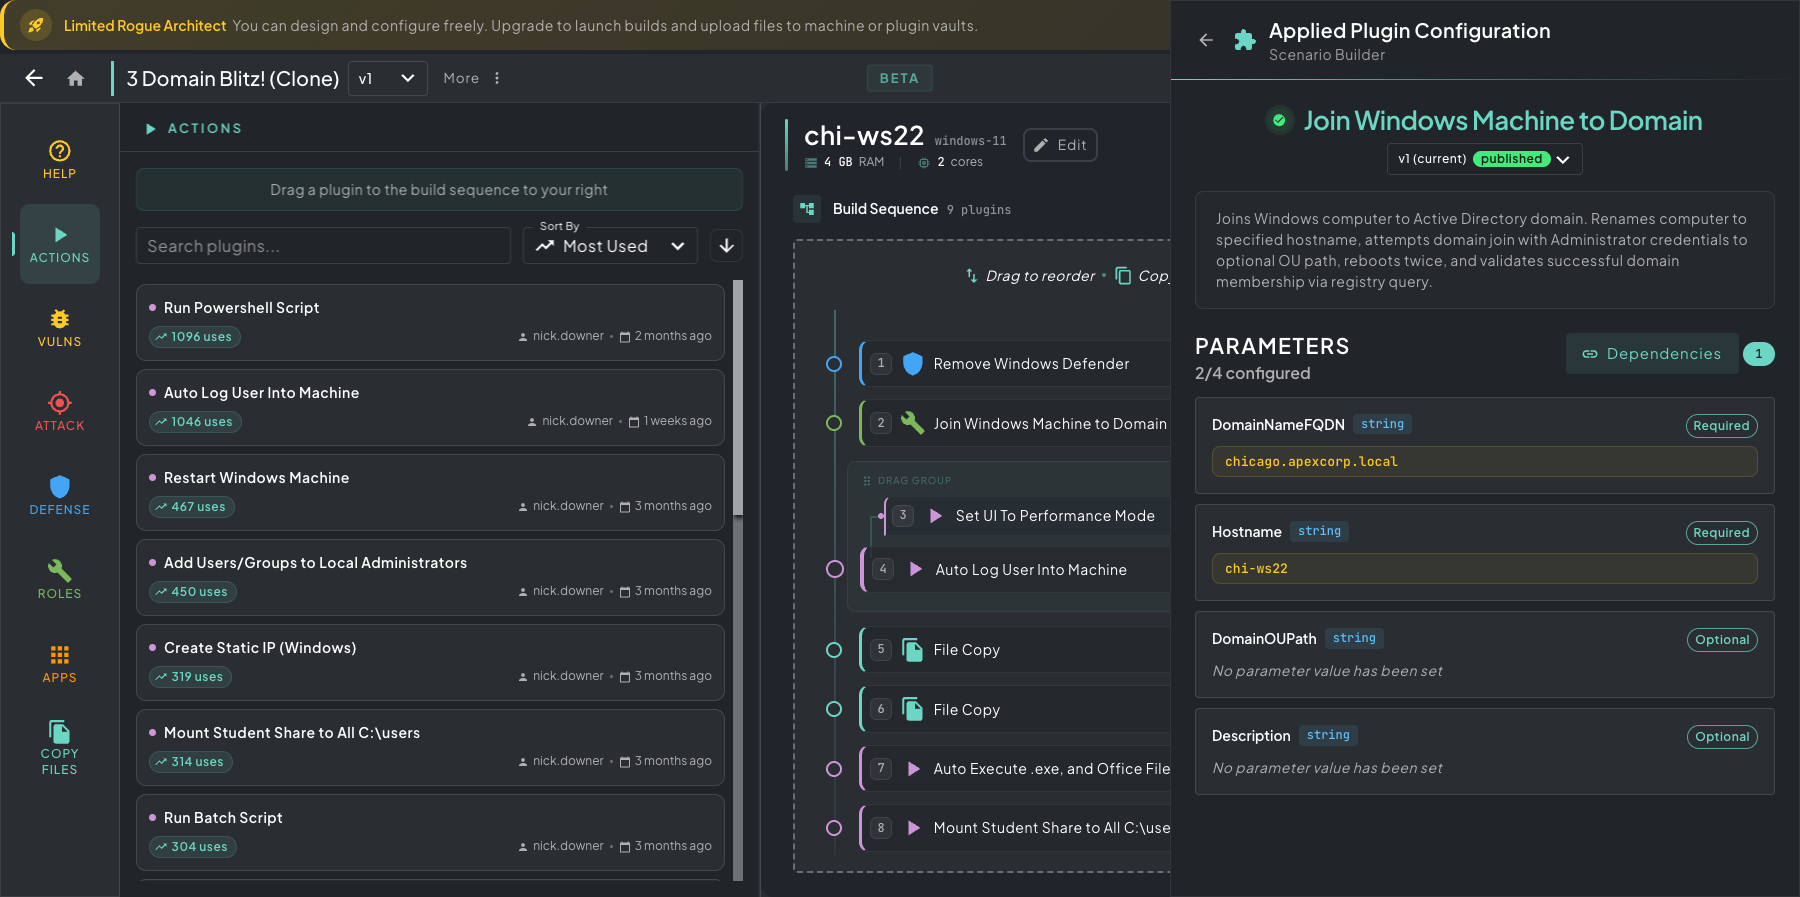 Plugin parameter panel — opening a plugin in the build sequence reveals every required and optional input it accepts.
Parameter Types
Section titled “Parameter Types”Parameters come in several types, each with a purpose-built editor:
| Type | Editor | Use Case |
|---|---|---|
| String | Text input | Simple values like usernames, IP addresses, domain names |
| Number | Numeric input | Ports, counts, timeouts |
| Boolean | Toggle switch | Enable/disable features |
| String Block | Code editor | Scripts, config files, multi-line content |
| CSV | Spreadsheet editor | Tabular data like user lists, IP tables |
String Block Editor
Section titled “String Block Editor”For string block parameters, you get a full code editor (Monaco — the same engine as VS Code) with syntax highlighting. Use the language selector to switch between:
- PowerShell, Bash/Shell, Batch
- Python, JavaScript, TypeScript
- YAML, JSON, XML, SQL
- Dockerfile, Plain Text
CSV Editor
Section titled “CSV Editor”For CSV parameters, you get a Monaco-powered editor with live linting and validation — formatting issues, malformed rows, and bad delimiters are flagged as you type, so you catch problems before the build runs.
Required vs Optional
Section titled “Required vs Optional”Each parameter shows whether it’s required or optional:
- Required parameters must have a value set before you can build. They show a warning indicator when empty.
- Optional parameters have default values that will be used if you don’t set them.
The plugin card in the build sequence shows a status indicator:
- Yellow — some required parameters are missing
- Green — all parameters are configured
Cross-Machine Dependencies
Section titled “Cross-Machine Dependencies”Some plugins depend on plugins running on other machines. For example, a Domain Join plugin on a workstation depends on a Domain Controller plugin running on a separate server.
When you open a plugin with cross-machine dependencies, the configuration panel shows which plugins on other machines this plugin depends on. Make sure those dependencies are configured and ordered correctly in the build sequence.
Automated Actions
Section titled “Automated Actions”Some plugins ship with automated actions — they automatically make canvas-level changes the moment you add or configure the plugin, so the surrounding scenario stays consistent without you having to wire it up by hand.
- Create DC — the domain name you set on the DC plugin is automatically added to the parent VLAN as a DNS forwarding target, so every other machine on that segment resolves the domain through the DC.
- Join Machine to Domain — automatically creates a cross-machine dependency from the join plugin back to the matching DC. This guarantees the DC is built first at build time; workstations only run their join step once the DC is fully up.
- Install Elastic Server — static domain names for the Elastic stack are auto-added to the network’s host mappings so other machines (agents, beats, attackers) can resolve them by name without manual DNS work.
Automated actions are part of the same system as the auto-apply automations you saw in Adding Plugins — both keep you from having to chase mechanical wiring around the canvas while you’re focused on scenario design.
The result: you never have to worry about machine build order, DNS forwarding, dependency wiring, or any other advanced networking detail — it’s all seamlessly abstracted away. Drop the plugin, the canvas adjusts.
Saving Parameters
Section titled “Saving Parameters”Parameters save individually. After setting a value, it’s persisted immediately. If you navigate away with unsaved changes, you’ll be prompted to confirm.